JAPANESE INDEX TOP
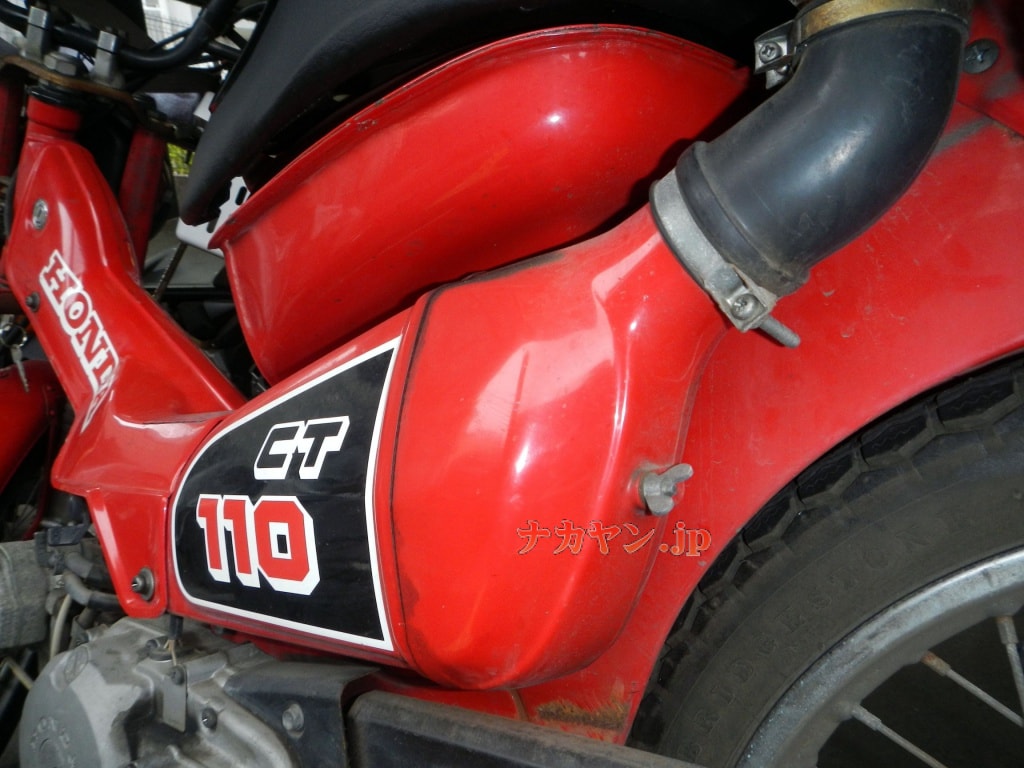
AIR CLEANER
( Refer to the maintenance precaution. )
The air cleaner should be serviced at regular intervals. When riding in dusty areas, more frequent service may be necessary.
- Remove the wing nut (1)

- washer and air cleaner tube clamp screw (2).
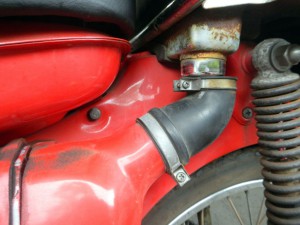
- Then remove the air cleaner tube and air cleaner housing cover.

- Unscerw the mounting plate bolt (3) and remove the mounting plate (4) .
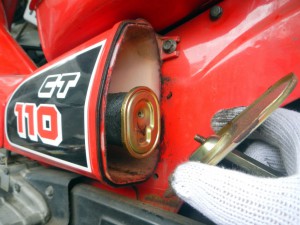
- Pull out the air cleaner (5) .

- Wash the air cleaner in non-flammable or high flash point solvent and let it dry thoroughly.
WARNING Never use petrol or low flash point solvents for cleaning the air cleaner.
A fire or explosion could result. - Soak the air cleaner in gear oil ( SAE 80 – 90 ) and squeeze out the excess.
- Install the removed parts in the reverse order of disassembly.


ENGINE OIL
( Refer to the maintenance precaution. )
Engine Oil
Good engine oil has many desirable qualities. Use only high detergent, quality motor oil certified on the container to meet or exceed requirements for service SE or SF. It is not necessary to use additives.
Viscosity:
Viscosity grade of engine oil should be based on average atmospheric temperature in your riding area. The following provides a guide to the selection of the proper grade or viscosity of oil to be used at various atmospheric temperatures.
Oil Change
Engine oil quality is the chief factor affecting engine service life. Change the engine oil as specified in the maintenance schedule.
|
Change engine oil with the engine at normal operating temperature and the motorcycle in an upright position to assure complete and rapid draining. |
- Remove the oil filler cap/despstick (1) and drain plug (2) to drain the oil.
WARNING A warmed-up engine and the oil in it are hot; be careful not to burn yourself. - With the ignition switch OFF, operate the kickstarter several times to drain any oil which may be left in the engine.
- Check that the sealing washer on the drain plugs is in good condition and install the plug. Replace the sealing washer every other time the oil is changed, or each time if necessary.
- Fill the crankcase with the recommended grade oil; approximately:
0.9 L ( 1.0 US qt, 0.8 Imp qt ) .
- Install the oil filler cap/dipstick.
- Start the engine and let it idle for a 2-3 minutes.
- Stop the engine and check that the oil level is at the upper level mark on the dipstick with the motorcycle uplight on firm, level ground.? Make sure there are no oil leaks.
|
Please dispose of used engine oil in a manner that is compatible with the environment. We suggest you take it in a sealed container to your local service station for reclamation. Do not throw it in the rubbish or pour it on the ground. | |
|
Used engin oil may cause skin cancer if repeatedly left in contact with the skin for prolonged periods. Although this is unlikely unless you handle used oil on a daily basis, it is still advisable to thoroughly wash your hands with soap and water as soon as possible after handling used oil. |
SPARK PLUG
( Refer to the maintenance precaution. )
Recommended plug
Standard :
DR8ES-L ( NGK ) or X24ESR-U ( NIPPONDENSO )
For cold climate ( Below 5°C, 41°F ) :
DR7ES ( NGK ) or X22ESR-U ( NIPPONDENSO )
For extended high speed riding :
DR8ES ( NGK ) or X27ESR-U ( NIPPONDENSO )
- Disconnect the spark plug caps from the spark plug.
- Clean any dirt from around the spark plug base. Remove the spark plug using the plug wrench furnished in the tool kit.
- Inspect the elecrtodes and center porcelain for deposits, erosion or cabon fouling. If the erosion or deposit is heavy, replace the plug. Clean a carbon or wet-fouled plug with a plug cleaner, otherwise use a wire brush.
- Check the spark plug gap (1) using a wiretype feeler guage. If adjustment is necessary, bend the side electrode (2) carefully.
The gap should be :0.6 – 0.7 mm ( 0.024 – 0.028 in )
Make sure the plug washer is in good condition.
- With the plug washer attached, thread the spark plug in by hand to prevent crossthreading.
- Tighten a new spark plug 1/2 turn with a spark plug wrench to compress the washer. If you are reusing a plug, it should only take 1/8 – 1/4 turn after the plug seat
- Reinstall the spark plug cap.
|
|
コメント